

Outdoor adventure gear is essential for a successful and enjoyable outdoor experience, whether it’s hiking, camping, or any other outdoor activity. To ensure the gear performs well and lasts for a long time, proper maintenance is crucial.
Proper storage is essential to maintain the quality and longevity of outdoor gear. We will share tips on how to properly store gear, including best practices for long-term storage. We will provide guidance on protecting gear from pests, moisture, and sun damage, which can all contribute to the deterioration of outdoor gear.
To ensure that maintenance is consistently performed, we will help you create a regular maintenance schedule for your outdoor gear. We will discuss the frequency at which gear should be checked and maintained to prevent any issues from arising during your outdoor adventures.
Why is it important to maintain outdoor adventure gear?
- Maintaining the quality and performance of outdoor adventure gear ensures that it remains safe to use during outdoor activities.
- Regular maintenance helps to prolong the lifespan of the gear, saving money in the long run.
- Proper maintenance reduces the risk of gear failure, which can be dangerous in remote or extreme environments.
- By keeping gear in good condition, it can continue to provide the necessary protection and functionality it was designed for.
- Regular maintenance also allows you to identify and address any issues or damage before they become more severe.
Fact: According to a study, the majority of gear failures in the outdoors are due to lack of maintenance and improper care.
Cleaning and Washing
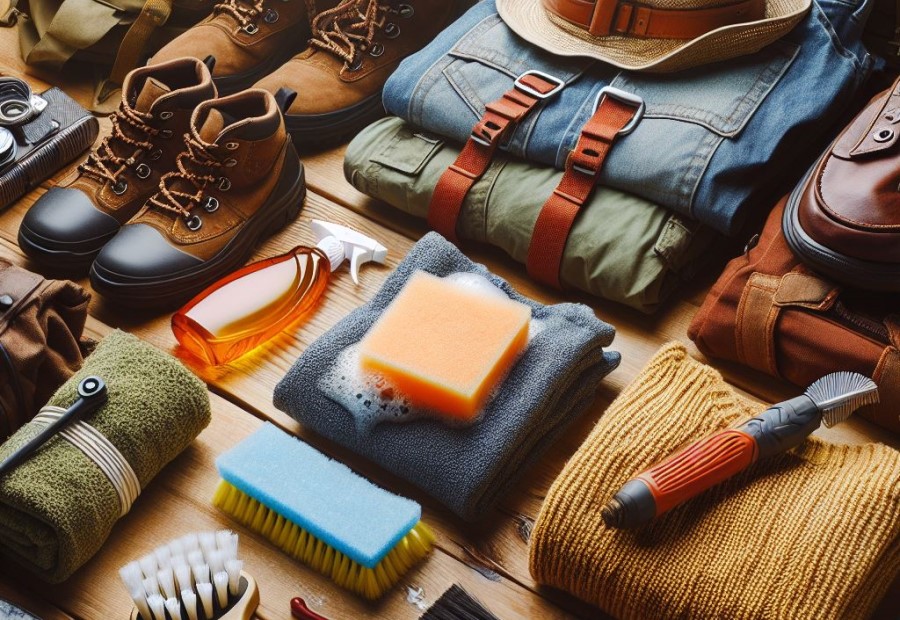
When it comes to cleaning and washing outdoor adventure gear, it is important to follow proper techniques to ensure longevity and performance. Here are some steps to keep in mind:
- Read the manufacturer’s instructions: Always refer to the care instructions provided by the gear’s manufacturer to ensure you are using the appropriate cleaning methods.
- Remove dirt and debris: Begin by brushing off any excess dirt or debris from the gear using a soft brush or cloth.
- Hand wash when possible: If the gear is machine washable, use a gentle detergent and warm water to hand wash it. Avoid using harsh chemicals or bleach.
- Spot clean as necessary: For small stains or areas that require extra attention, use a mild soap or specialized cleaner and gently scrub the affected area with a soft cloth or brush.
- Proper drying: Allow the gear to air dry thoroughly in a well-ventilated area. Avoid using direct heat sources, as this can damage the fabric or material.
- Treat waterproofing if necessary: If the gear has waterproofing properties, consider reapplying a suitable waterproofing treatment after cleaning to maintain its effectiveness.
- Store properly: After cleaning and drying, store your outdoor gear in a cool, dry place away from direct sunlight to prevent mold, mildew, and deterioration.
By following these steps, you can ensure that your outdoor adventure gear remains clean, fresh, and ready for your next exciting expedition.
How to clean different types of outdoor gear?
When it comes to cleaning different types of outdoor gear, it is important to follow specific steps to ensure proper maintenance and longevity.
Here is a step-by-step guide:
- Gather all the necessary supplies for cleaning, including a gentle detergent or specialized cleaning product, a soft brush or sponge, and warm water.
- Before cleaning, remove any loose dirt or debris from the gear by shaking it or using a soft brush.
- For clothing and fabric gear, check the care instructions for specific washing guidelines. If the gear is machine washable, use a gentle cycle and cold water. Hand-washing is recommended for delicate items.
- For hard gear such as boots or equipment, use the soft brush or sponge to gently scrub away any dirt or stains. Be careful not to use any harsh brushes or abrasive cleaners that may damage the surface.
- Rinse the gear thoroughly with warm water to remove any soap residue.
- For waterproof gear, it is important to reapply a waterproofing treatment after cleaning. Follow the product instructions and apply the treatment evenly to ensure maximum protection.
- After cleaning, allow the gear to air dry completely before storing or using it again. Avoid using direct heat sources or exposing the gear to excessive sunlight, as this can cause damage.
By following these steps, you can effectively clean different types of outdoor gear and maintain their quality and performance over time.
What cleaning products should be used?
When cleaning your outdoor adventure gear, it is important to use the right cleaning products to ensure proper maintenance and longevity.
Here are some recommended cleaning products:
- Mild detergent: It is recommended to use a mild detergent specifically designed for outdoor gear to gently clean fabrics without damaging the waterproof or breathable properties.
- Specialized cleaning sprays: Some gear, such as tents or backpacks, may require specialized cleaning sprays that target specific stains or odors.
- Gear-specific cleaners: Certain types of gear, like climbing ropes or wetsuits, may have specific cleaners tailored to their unique materials and needs.
- Baking soda: Baking soda is a versatile and eco-friendly option for removing odors from gear. It can be used as a pre-soak or mixed with water to create a cleaning solution.
- White vinegar: White vinegar is effective for removing mildew and mold from gear. It can be mixed with water and used as a cleaning solution or as a soak for particularly stubborn stains.
- Nikwax products: Nikwax produces a range of specialized products for waterproofing and cleaning outdoor gear. They offer solutions for different materials such as jackets, boots, and gloves.
By using these appropriate cleaning products, you can effectively remove dirt, stains, and odors from your outdoor adventure gear, keeping it in excellent condition for your next exciting outdoor excursion.
Are there any special techniques for washing certain gear?
- Always refer to the manufacturer’s instructions: Before washing any gear, it is important to read and follow the manufacturer’s instructions for specific cleaning recommendations.
- Pre-treat stains: If there are any stains on the gear, it is recommended to pre-treat them with a suitable stain remover before washing.
- Follow the recommended water temperature: Different gear may require different water temperatures, so make sure to follow the recommendations provided for each specific item.
- Choose a mild detergent: Select a mild detergent that is suitable for the fabric or material of the gear to ensure proper cleaning.
- Consider hand washing or gentle machine wash: Depending on the gear, it may be necessary to either hand wash it or use a gentle cycle in the washing machine.
- Be gentle while cleaning: To prevent any damage or wear and tear, avoid harsh scrubbing and handle the gear with care.
- Rinse thoroughly: After washing, make sure to thoroughly rinse the gear to remove all traces of detergent.
- Air dry the gear: After washing, allow the gear to air dry completely. Avoid using high heat or exposing it to direct sunlight, as this can potentially damage certain materials.
Fact: Using the wrong cleaning technique or detergent can potentially damage and shorten the lifespan of outdoor gear. By following the proper washing techniques, you can maintain the integrity and functionality of your gear for a longer period of time.
Waterproofing
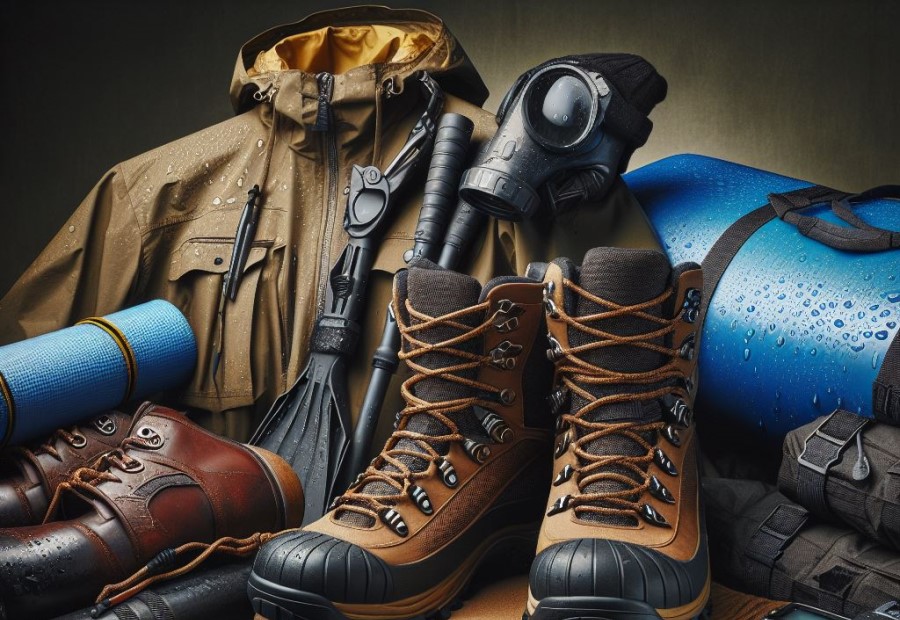
When it comes to waterproofing outdoor adventure gear, there are a few important steps to follow:
- Clean: Before applying any waterproofing treatment, make sure to thoroughly clean the gear. Use a gentle soap and water solution to remove any dirt or debris.
- Check: Inspect the gear for any damage or wear, such as tears or loose seams. Repair any issues before waterproofing.
- Treat: Apply a waterproofing product specifically designed for the material of your gear, whether it’s a jacket, tent, or backpack. Follow the manufacturer’s instructions for the best results.
- Dry: Allow the gear to fully dry after applying the waterproofing treatment. This will ensure that the product properly bonds to the material.
- Test: After waterproofing, test the gear’s effectiveness by spraying water or standing under a sprinkler. Look for any areas where water may be penetrating and address those spots accordingly.
- Maintain: Regularly check the waterproofing on your gear and reapply the treatment as needed. Over time, the waterproofing may wear off and require refreshing.
Following these steps will help ensure that your outdoor adventure gear remains properly waterproofed and ready for any weather conditions you may encounter.
Why is waterproofing important for outdoor gear?
Waterproofing is extremely important for outdoor gear. It provides protection against moisture, which is essential for ensuring the longevity of the equipment. Without proper waterproofing, outdoor gear can be vulnerable to water damage, putting its functionality and durability at risk.
When gear becomes wet, it becomes heavy and uncomfortable to wear. In extreme conditions, it may even lead to hypothermia.
Additionally, moisture can cause mold and mildew to grow on gear, resulting in unpleasant odors and potential health hazards. Waterproofing prevents water from permeating fabrics or materials, ensuring they remain dry and maintain their performance.
Whether it’s a rain jacket, hiking boots, or a tent, waterproofing is an absolute necessity for outdoor gear to withstand wet conditions. It allows adventurers to stay dry and comfortable, enabling them to fully enjoy their outdoor activities without worrying about getting soaked or damaging their gear.
How to waterproof outdoor gear?
To ensure that your outdoor gear remains protected from moisture and stays waterproof, follow these steps on how to waterproof outdoor gear:
- Clean the gear: Before waterproofing, make sure the gear is clean and free from any dirt or debris. Use a mild detergent and water to remove any stains or grime.
- Check for damage: Inspect the gear for any tears, holes, or worn-out areas that may need to be repaired before waterproofing. Patch up any damaged areas using appropriate repair materials.
- Choose the right waterproofing product: Select a waterproofing product that is suitable for the specific type of gear you have. Different materials may require different types of waterproofing solutions.
- Apply the waterproofing product: Follow the instructions provided with the waterproofing product to apply it evenly onto the surface of the gear. Use a brush or sponge for precise application.
- Ensure full coverage: Pay attention to areas that are more prone to water penetration, such as seams and zippers. Apply an extra layer of waterproofing solution to ensure complete coverage.
- Let it dry: Allow the gear to dry completely before using it. This may take several hours or overnight, depending on the product and weather conditions.
- Test the waterproofing: Once the gear is dry, perform a simple water test to check the effectiveness of the waterproofing. Pour some water onto the gear and see if it beads up and rolls off instead of soaking into the fabric.
- Reapply as needed: Over time, the waterproofing may wear off, especially with frequent use. Reapply the waterproofing product periodically to maintain its effectiveness.
What waterproofing products are recommended?
When selecting waterproofing products for your outdoor gear, it is crucial to consider the specific materials and items you will be treating. Follow the instructions provided by the manufacturer for optimal results.
Furthermore, ensure that the products you choose are compatible with your gear. Regularly reapply waterproofing treatments as necessary to maintain the water repellency of your gear and extend its lifespan.
Here are some highly recommended waterproofing products for various types of outdoor gear:
- Aquaseal UV: This product is highly recommended for waterproofing outdoor gear such as tents, jackets, and backpacks. It effectively seals small punctures and tears.
- Nikwax TX.Direct: Ideal for restoring water repellency to jackets, pants, and other clothing items, this waterproofing product ensures breathable waterproof protection.
- Gear Aid Revivex Durable Waterproofing Spray: Specifically designed for durable water repellency on gear like boots, gloves, and hats, this spray provides long-lasting protection in wet conditions.
- Granger’s Xtreme Repel: Suitable for a variety of outdoor gear, this waterproofing spray creates a highly water-repellent finish while maintaining breathability.
- Atsko Silicone Water-Guard: Formulated specifically for waterproofing footwear, including hiking boots and shoes, this product offers protection against both water and stains.
- Scotchgard Heavy Duty Water Shield: An effective waterproofing spray for fabric outdoor gear, including tents, tarps, and backpacks, providing strong water repellency.
Considering these options, choose the waterproofing product that best suits your needs and the type of gear you have.
Repairing

When it comes to repairing outdoor adventure gear, there are a few important steps to follow:
- Assess the damage: Carefully examine the gear to identify the specific areas that need to be repaired.
- Gather the necessary tools and materials: Depending on the type of gear and the extent of the damage, you may need items such as patches, glue, thread, needles, or replacements parts.
- Follow manufacturer instructions: If available, consult the instructions provided by the gear’s manufacturer for specific repair guidance.
- Take a systematic approach: Start by addressing small repairs and gradually work your way up to more complex ones.
- Ensure proper cleaning: Before beginning any repairs, make sure to clean the gear as dirt or debris can hinder the effectiveness of the repair.
- Make precise repairs: Focus on fixing the specific areas that are damaged, rather than applying a general patch or fix.
- Test the gear: After completing the repairs, test the gear to ensure that it is functioning properly and can withstand outdoor use.
How to identify and repair common issues with outdoor gear?
- Inspect the gear: Carefully examine the gear for any signs of damage or wear. Look for tears, holes, loose threads, or any other issues.
- Create a repair plan: Determine the best course of action for each issue. Prioritize repairs based on safety and functionality.
- Fix tears and holes: Use appropriate materials, such as patches or adhesive, to repair any tears or holes in the gear. Follow the manufacturer’s instructions or consult online tutorials for guidance.
- Tighten loose threads or fasteners: Check for loose threads or fasteners like buttons, zippers, or buckles. Secure them tightly to ensure the gear functions properly.
- Replace worn-out parts: If any parts of the gear, such as straps or clips, are worn out or broken, consider replacing them. Use compatible replacement parts from the manufacturer or a trusted supplier.
- Test the repaired gear: Once the repairs are complete, test the gear to ensure it functions as intended. This may involve putting weight or pressure on the gear or simulating real-world usage.
- Maintain the gear: Going forward, regularly inspect and maintain the gear to prevent further issues. Clean it properly after each use and store it according to the manufacturer’s recommendations.
What tools and materials are needed for repairs?
When it comes to repairing outdoor gear, it is essential to have the right tools and materials.
Here are some of the items you will need:
- Multi-tool: A versatile tool that usually includes pliers, knives, screwdrivers, and other useful functions.
- Sewing kit: Including needles, thread, and a thimble for repairing rips and tears in fabric.
- Tape: Duct tape or gear repair tape for quick fixes on tents, sleeping bags, or clothing.
- Glue: Waterproof adhesive for repairing seams or attaching patches.
- Patch material: Patches made of fabric, nylon, or other suitable materials for covering holes or reinforcing weak areas.
- Cordage: Strong and durable ropes or cords for making repairs or replacing broken elements.
- Zippers and sliders: Replacements for broken or damaged zippers on backpacks, jackets, or tents.
- Buckles and clips: For replacing broken or worn-out fasteners on gear.
- Replacement parts: Springs, tent poles, or other components specific to your gear that may need replacing.
- Cleaning supplies: Such as brushes, mild soap, and water to prep the gear for repairs.
These tools and materials will help you tackle common repairs on outdoor adventure gear, ensuring that you can fix any issues that arise and continue to enjoy your outdoor activities.
Are there any DIY repair techniques?
Are there any DIY repair techniques when it comes to repairing outdoor gear? There are several techniques you can try before seeking professional help:
- Equipment patching: For small tears or punctures in tents, sleeping bags, or jackets, you can use repair patches or tape specifically designed for outdoor gear. Follow the instructions carefully to ensure a proper and durable repair.
- Zipper fix: If a zipper gets stuck or starts malfunctioning, you can try using a lubricant like beeswax or a zipper cleaner to remove any debris or dirt that might be causing the issue. Additionally, you can use pliers to gently realign any bent teeth or replace the zipper pull if it’s broken.
- Seam sealing: Over time, the seam sealing on tents or rain jackets may wear off, causing leaks. You can reapply seam sealer using a brush or applicator to ensure the waterproof integrity of the gear. Make sure to clean the seams thoroughly before applying the new sealer.
- Sole repair: If the sole of your hiking boots starts to come off, you can use a strong adhesive, like shoe glue or epoxy, to reattach it. Clean the area, apply the adhesive evenly, and let it dry according to the product instructions.
Storage
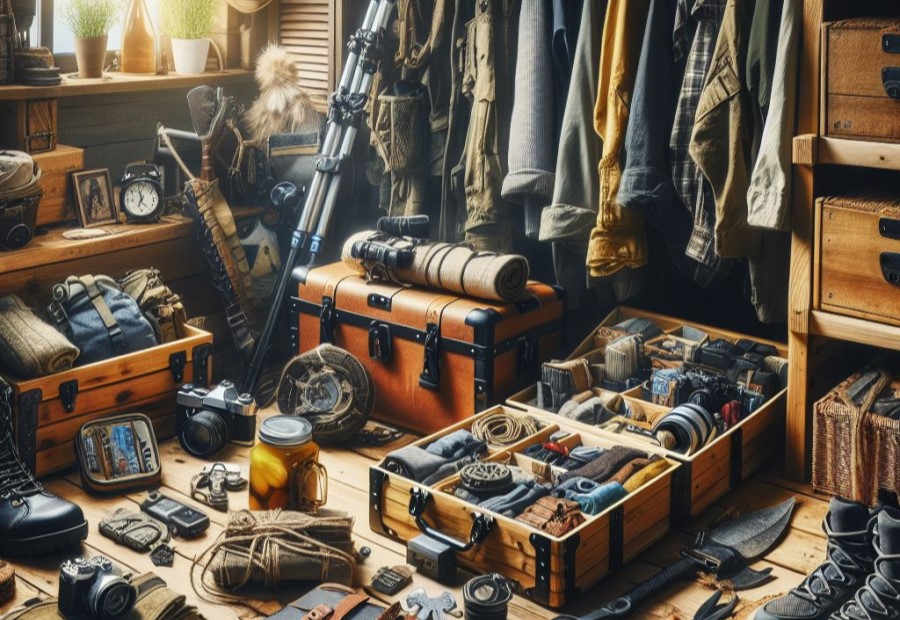
When it comes to storage, it is important to take proper care of your outdoor adventure gear to maintain its quality and prolong its lifespan.
| Tip | Explanation |
| Keep it clean | Before storing your gear, make sure to thoroughly clean it to remove any dirt, debris, or sweat. |
| Ensure dryness | Moisture can lead to the growth of mold and mildew, so ensure your gear is completely dry before storing it. |
| Proper ventilation | Store your gear in a well-ventilated area to prevent the buildup of musty smells and to allow for air circulation. |
| Organize and separate | Keep your gear neatly organized and separate different items to prevent damage and make them easier to find. |
| Avoid direct sunlight | Exposure to direct sunlight can fade colors and weaken materials, so store your gear in a cool, shaded area. |
| Protect from pests | Use insect repellents or store your gear in sealed containers to prevent damage from pests. |
How to properly store outdoor gear?
If you’re wondering how to properly store outdoor gear, here are some steps to follow to maintain its quality and prolong its lifespan:
- Clean the gear: Before storing, make sure to clean all outdoor gear thoroughly to remove any dirt, sweat, or debris. Use appropriate cleaning products for each type of gear.
- Ensure it is completely dry: Moisture can cause mold, mildew, and damage to the gear. Allow the gear to air dry completely before storing it.
- Organize and categorize: Sort and organize the gear based on its type and use. This will make it easier to locate specific items when needed.
- Choose a suitable storage location: Find a cool, dry, and well-ventilated area to store the gear. Avoid places with extreme temperatures or high humidity as they can damage the gear.
- Use appropriate containers: Store gear in containers or bags specifically designed for outdoor gear storage. These containers should be durable and provide protection against dust, moisture, and pests.
- Properly fold or roll: Fold or roll the gear carefully to optimize space and prevent creasing or damage. Follow any specific folding instructions for certain types of gear.
- Label the containers: Use labels or tags to identify the contents of each container. This will make it easier to find specific items without having to go through multiple containers.
- Regularly check for any issues: Periodically inspect the stored gear for any signs of damage, wear and tear, or pest infestation. Address any issues promptly to prevent further damage.
- Follow manufacturer guidelines: Refer to the manufacturer’s instructions for any additional storage recommendations specific to the gear you have.
By following these steps, you can ensure that your outdoor gear stays in optimal condition and is ready for your next adventure.
How to protect gear from pests, moisture, and sun damage?
To effectively protect your gear from pests, moisture, and sun damage, follow these steps:
- Store your gear in a dry and clean area, far away from any pests. It’s best to keep it in a sealed container or use protective covers.
- Regularly inspect your gear for any signs of pests or moisture. If you notice any insects, promptly remove them and clean the affected areas.
- Avoid storing your gear in direct sunlight for extended periods, as the UV rays can cause fabric and material fading and damage.
- To shield your gear from moisture, consider using waterproofing products. Follow the manufacturer’s instructions and apply a waterproof spray or treatment.
- If you’re going hiking or camping, it’s recommended to use gear-specific pest repellents or insecticides to deter pests.
- Prior to storing your gear, make sure it is properly dried to prevent the growth of mold and mildew.
- Follow the manufacturer’s instructions to clean your gear regularly and remove any dirt or debris that might attract pests.
- For small electronic devices, use protective covers or cases to safeguard them against sunlight and moisture.
- Avoid storing your gear in damp or humid areas, as this can encourage the growth of mold and mildew.
- Regularly inspect and maintain zippers, seams, and other vulnerable areas to address any potential damage or wear.
Regular Maintenance Schedule
Regular maintenance schedule is crucial when it comes to maintaining your outdoor adventure gear.
Here’s a step-by-step guide on how to keep your gear in top condition:
- Clean your gear: After each use, clean your gear properly to remove dirt, mud, and debris. Use mild soap and water to clean fabrics, and a soft brush to scrub off any stubborn dirt.
- Check for damage: Inspect your gear for any signs of damage, such as rips, tears, or broken parts. Address any issues before they worsen to prevent further damage.
- Repair and replace: If you find any damage, repair it promptly using suitable repair kits or seek professional help if necessary. Replace any worn-out or damaged components to ensure optimal performance.
- Inspect zippers and fasteners: Regularly check the condition of zippers, buckles, and other fastening mechanisms. Lubricate them if needed to ensure smooth operation.
- Store properly: When not in use, store your gear in a clean, dry, and well-ventilated area. Avoid exposure to direct sunlight or extreme temperatures as they can cause damage.
Pro-tip: Creating a maintenance log can help you keep track of when you last cleaned, inspected, and repaired your gear. This will ensure that you stay on top of your regular maintenance schedule and extend the lifespan of your outdoor adventure gear.
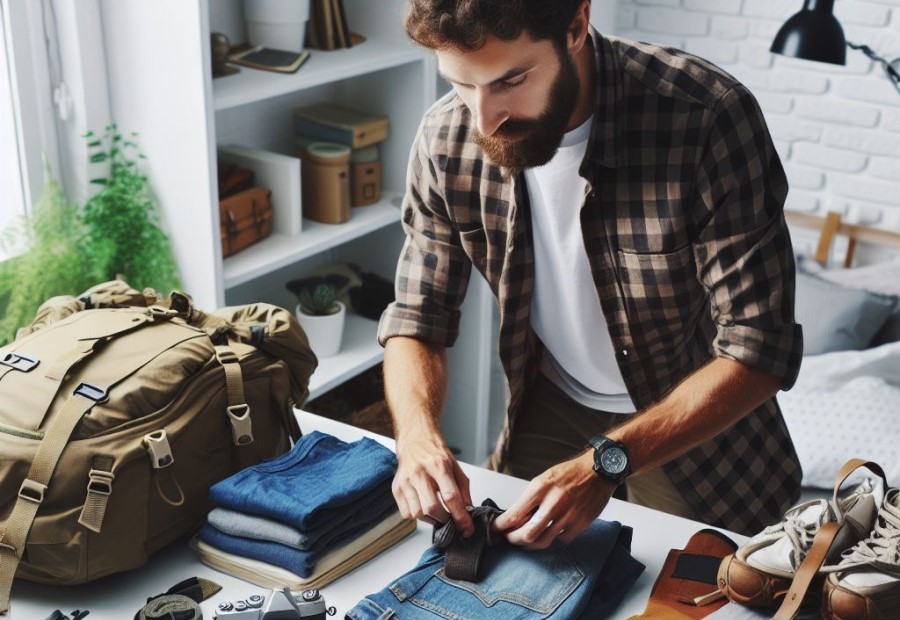
Creating a maintenance routine for outdoor gear
Creating a maintenance routine for outdoor gear is essential for ensuring its longevity and functionality. If you follow these steps, you can keep your gear in excellent condition and prolong its lifespan.
Inspect regularly: Check your outdoor gear regularly for any signs of damage or wear. Look for tears, loose stitches, or broken buckles.
Clean properly: Clean your gear after each use to remove dirt, sweat, and other debris. Follow manufacturer guidelines for cleaning specific items such as tents or backpacks.
Store correctly: Proper storage is crucial in maintaining the condition of your outdoor gear. Make sure to store it in a clean, dry place away from moisture and direct sunlight.
Repair promptly: If you notice any damages, repair them as soon as possible to prevent further deterioration. Use appropriate tools and materials for each repair.
Replace when necessary: Outdoor gear has a limited lifespan, so it’s important to replace worn-out or damaged items to ensure your safety and enjoyment during outdoor activities.
By following these steps and creating a regular maintenance routine, you can keep your outdoor gear in excellent condition and prolong its lifespan.
Frequently Asked Questions
How often should I wash my outdoor adventure gear?
It is recommended to wash your outdoor adventure gear after every four or five uses, but the frequency may vary depending on usage and conditions. Use a cleaner specifically designed for outdoor gear and follow the instructions on the gear and cleaner labels.
How can I restore the water repellency of my rain jacket, snow pants, or tent?
If the water repellency of your outdoor gear diminishes over time, a thorough cleaning can often restore it. If that’s not enough, you can use a wash-in or spray-on water repellent treatment. Opt for PFC-free products like Nikwax for minimal environmental impact.
How can I repair peeling or sticky tent floors and seams?
To repair peeling or sticky tent floors and seams, remove the peeling coatings and seam tape and use a sealant designed for outdoor gear, such as those from Gear Aid to re-seal the areas. This will ensure protection from the elements.
Can I fix faulty zippers on my outdoor gear?
Yes, faulty zippers can often be fixed by lubricating them. Use a zipper lubricant like the one from Gear Aid to make the zippers work smoothly again.
How can I repair holes in my outdoor gear?
Holes are common in ultralight gear, but they don’t mean the end of the item’s life. Use patch kits to repair punctures in tent floors, jackets, sleeping pads, and more. Clean the surface before applying the patch, and each patch tells a story and adds character to the gear.
How should I clean and maintain my outdoor shoes and boots?
Cleaning shoes and boots is a hands-on process. Use a shoe cleaning kit suitable for the material of the footwear and follow the instructions. After cleaning, apply a water repellent designed for footwear to enhance their waterproof protection.