

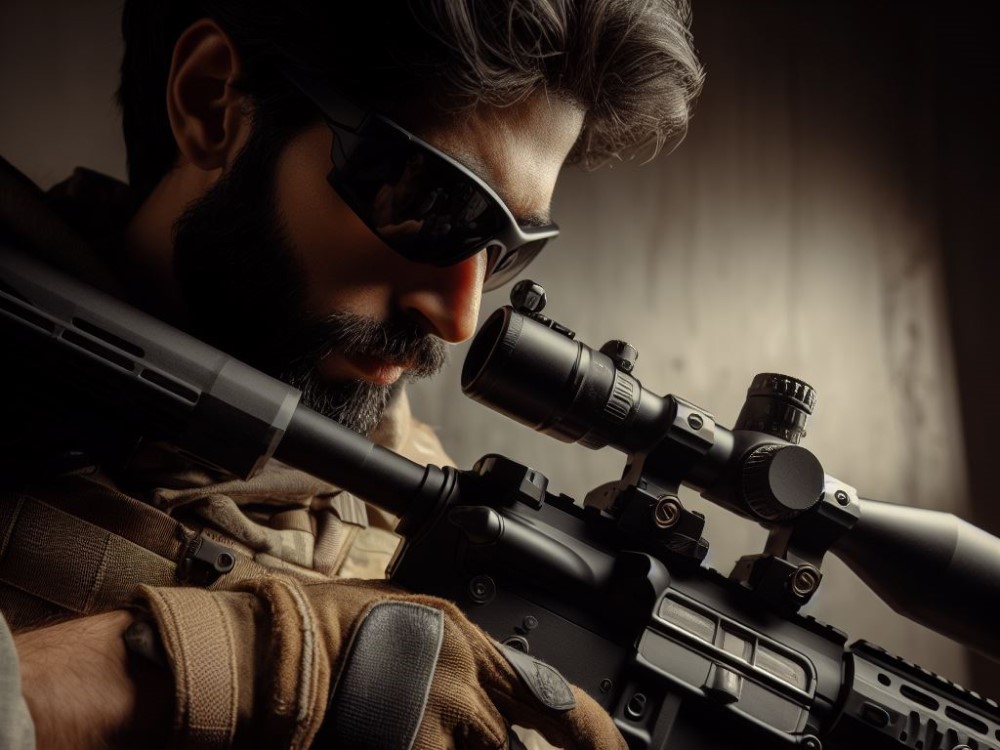
Mounting a scope on a Picatinny rail is a crucial step in ensuring accurate and precise shooting. The Picatinny rail, also known as a MIL-STD-1913 rail, is a standard mounting system used on firearms to attach various accessories such as scopes, red dot sights, and lasers. In this article, we will guide you through the process of mounting a scope on a Picatinny rail.
Before diving into the steps, it’s important to understand the basics of a rifle scope. A rifle scope is an optical device that magnifies the target and provides better accuracy for shooters. It consists of several parts, including the ocular lens, objective lens, erector tube, reticle, and turrets, that work together to provide a clear and precise sight picture.
Choosing the right scope for your firearm is essential. Factors such as magnification, reticle type, and objective lens size should be considered. Also, ensure that the scope you choose is compatible with the Picatinny rail system on your firearm.
Now, let’s move on to the step-by-step guide on how to mount a scope on a Picatinny rail. This includes gathering the necessary tools and equipment, preparing your firearm for scope mounting, properly aligning the scope rings with the rail, securing the scope rings, and attaching the scope. Finally, we’ll discuss leveling the scope and making final adjustments for optimal performance.
To ensure the longevity of your mounted scope, proper maintenance and care are crucial. We’ll provide tips on how to clean and protect your scope. we’ll cover the process of zeroing and sighting in your scope to achieve accurate shots.
By following this comprehensive guide, you will be able to mount your scope securely and precisely onto a Picatinny rail, enhancing your shooting experience and maximizing accuracy.
Understanding the Basics of a Scope

Photo Credits: Paintballbuzz.Com by Gary Scott
Understanding the Basics of a Scope is crucial when it comes to mounting one on a Picatinny rail. Scopes serve as optical devices that enhance clarity and magnify a target, thereby facilitating accurate aiming.
They consist of various components, including lenses, reticles, and adjustment turrets. The lenses play a significant role in gathering and focusing light to deliver a clear image. Additionally, the reticle aids in aiming and measuring distance, while the adjustment turrets allow for precise windage and elevation adjustments.
It is essential to have comprehensive knowledge about the different types of scopes available, such as fixed or variable magnification, and to select the appropriate scope that aligns with your specific shooting requirements.
By having a solid grasp of the basics of a scope, you can confidently choose and mount one on a Picatinny rail.
What is a Rifle Scope?
A rifle scope is a remarkable optical device that is securely mounted on a firearm, enhancing the shooter’s accuracy and precision when aiming at various targets. By providing exceptional magnification and a well-defined reticle, commonly known as crosshairs, a rifle scope assists shooters in aligning their aim effectively.
The primary and fundamental purpose of incorporating a reliable rifle scope is to significantly enhance the shooter’s ability to clearly see and effectively target distant objects.
Rifle scopes are generally composed of meticulously crafted lenses, a durable tube, and a highly functional adjustment system. These lenses work harmoniously to expertly gather and transmit light, resulting in remarkably clear and impeccably sharp images.
The encompassing tube effectively houses and safeguards these exceptional lenses from potential damage caused by external elements. Additionally, the well-designed adjustment system facilitates shooters in effortlessly adjusting the focus, magnification, as well as windage and elevation settings.
When choosing an ideal rifle scope, there are several crucial factors that should be seriously considered.
These include thoughtfully evaluating the intended use of the firearm, determining the specific distance at which the shooter intends to engage targets, selecting the desired magnification level, and adhering to the appropriate budget.
It is of utmost importance to meticulously select a rifle scope that is perfectly suited for the particular firearm and prevailing shooting conditions.
What are the Different Parts of a Scope?
The different parts of a scope include:
- Objective Lens: The objective lens is the front lens of the scope that gathers light and focuses it.
- Eyepiece: The eyepiece, located at the back of the scope, is where you place your eye to look through the scope.
- Turrets: Turrets, which are knobs on the scope, allow you to make adjustments for windage (horizontal) and elevation (vertical) to correct for bullet drop and wind drift.
- Reticle: The reticle, also known as the crosshair, is the pattern or markings in the scope that help you aim accurately.
- Tube: The tube, made of aluminum or other durable materials, is the body of the scope that houses the lenses and other internal components.
- Adjustment Rings: These rings are used to adjust the focus and zoom of the scope, enabling you to have a clear and magnified view of your target.
Pro-tip: When selecting a scope, consider the specific features and adjustments you need based on your shooting style, firearm, and intended use. It’s important to choose a scope that suits your needs and enhances your shooting accuracy.
Step-by-Step Guide: How to Mount a Scope on a Picatinny Rail
Want to enhance your shooting accuracy? Look no further! In this step-by-step guide, we’ll walk you through how to mount a scope on a Picatinny rail.
From gathering the necessary tools and preparing your firearm for scope mounting, to aligning the scope rings with the rail and securing the scope in place, we’ve got you covered.
Plus, we’ll dive into leveling the scope and making those final adjustments for optimal precision. Get ready to take your shooting game to the next level!
Gather the Necessary Tools and Equipment
When preparing to mount a scope on a Picatinny rail, it is crucial to gather the necessary tools and equipment. Here is a step-by-step list of what you will need:
- Screwdriver or Allen wrench: To loosen and tighten the scope rings and mounting screws, you will require an appropriate size screwdriver or Allen wrench.
- Scope rings: It is important to select scope rings that are compatible with both your scope and the Picatinny rail. Choose rings of the appropriate height for your desired scope position.
- Torque wrench: A torque wrench is essential to ensure that the mounting screws are tightened according to the recommended torque specifications. This prevents both over-tightening and under-tightening.
- Level: To ensure proper alignment of the scope, it is crucial to use a leveling tool such as a bubble level or digital level. This will greatly aid in achieving accurate shots.
- Lapping bar and lapping compound (optional): If you wish to achieve optimal contact between the scope rings and scope tube, you may utilize a lapping bar and lapping compound to lap the rings.
- Cleaning supplies: Before mounting the scope, it is vital to clean the rifle and the scope rings thoroughly. This step ensures the removal of any debris or oil that might jeopardize stability and grip.
Make sure to have all the necessary tools and equipment at hand before commencing the process of mounting the scope on a Picatinny rail. This will guarantee a successful and secure installation.
Prepare Your Firearm for Scope Mounting
To properly prepare your firearm for scope mounting, carefully follow these steps:
- Begin by ensuring that your firearm is completely unloaded and the chamber is empty. Remember, safety should always be your top priority.
- Remove any accessories or attachments that might obstruct or interfere with the scope mounting process.
- Thoroughly clean your firearm, removing any dirt, debris, or oil that could impact the mounting process or the scope’s accuracy.
- Inspect the Picatinny rail on your firearm for any signs of damage or wear. Make sure it is clean and free from any obstructions.
- If necessary, adjust and align the rail to ensure it is parallel to the barrel and properly positioned.
- Before mounting the scope, carefully double-check and tighten any loose screws or fasteners on your firearm to ensure they are securely in place.
- Prior to mounting the scope onto your firearm, make sure the scope itself is clean and free from any dirt or debris that could affect its performance.
- Take the time to inspect the scope rings and mounts for any damage or defects. Also, ensure they are the correct size and securely fit onto the Picatinny rail.
- Securely place the rings onto the rail and cautiously tighten the screws to firmly hold them in place. It is important not to overtighten and cause damage to the rail.
- Properly position the scope in the rings, ensuring that it is level and aligned with the firearm’s bore.
- Once the scope is properly aligned, securely attach it to your firearm by tightening the screws on the rings.
By diligently following these steps, you can guarantee that your firearm is well-prepared for scope mounting, ultimately leading to accurate and effective shooting.
Properly Aligning the Scope Rings with the Rail
Ensuring accurate and stable mounting of a scope on a Picatinny rail requires properly aligning the scope rings with the rail. Here are the steps to follow:
- To start, evenly position the bottom half of the scope rings on both sides of the Picatinny rail.
- Partially tighten the screws on the bottom half of the rings, leaving room for adjustments later.
- Center and level the scope on the bottom half of the rings.
- Loosely tighten the screws on the top half of the scope rings.
- With the scope in place, check if the reticle aligns vertically and horizontally with the rail by looking through the scope.
- If necessary, loosen and tighten the screws on the scope rings to make adjustments and align the reticle with the rail.
- Continue making adjustments until the reticle is perfectly aligned with the rail.
- Once the scope rings are properly aligned, securely tighten all the screws to ensure the scope is securely mounted on the Picatinny rail.
Achieving optimal accuracy when using a scoped firearm relies on properly aligning the scope rings with the rail.
Securing the Scope Rings and Attaching the Scope
To ensure secure attachment of the scope to a Picatinny rail, follow these steps:
- Before anything else, make sure that the Picatinny rail is clean and free from debris or any obstructions.
- Align the scope rings with the mounting holes on the rail and place them properly.
- Using the appropriate tools, securely tighten the screws on the scope rings to fasten them to the rail. Be cautious not to overtighten and potentially damage the rail.
- Position the scope within the mounted rings, aligning it with the rail and ensuring it is leveled.
- To attach the scope to the rings, use the provided screws or clamps based on the scope’s type. Securely tighten them without overtightening, which might cause harm to the scope.
- If needed, utilize a scope leveling tool to check the alignment and levelness of the attached scope.
- Finally, make any necessary adjustments to the scope’s position and angle to ensure optimal comfort and sight alignment.
Leveling the Scope and Final Adjustments
To properly level the scope and make final adjustments, follow these steps:
- Before starting, ensure that your firearm is secure and unloaded.
- Loosely tighten the screws to place the scope in the rings.
- Adjust the eye relief while looking through the scope to ensure comfort and clarity.
- Use a bubble level or scope leveling tool to make sure the rifle is level.
- Once the rifle is level, gradually and evenly tighten the screws on the scope rings to firmly secure the scope.
- To align the vertical and horizontal crosshairs of the scope perfectly, check them against a plumb line and level surface. Make necessary adjustments.
- To prevent any movement, firmly tighten all screws and bolts after making adjustments.
- Look through the scope again to perform a final check of the reticle. Make minor adjustments if needed to align the reticle with your target.
Remember to follow the specific instructions provided by the scope manufacturer, as adjustment processes may vary between different scopes.
Taking the time to properly level the scope and make final adjustments will greatly improve your shooting accuracy.
Additional Tips and Considerations
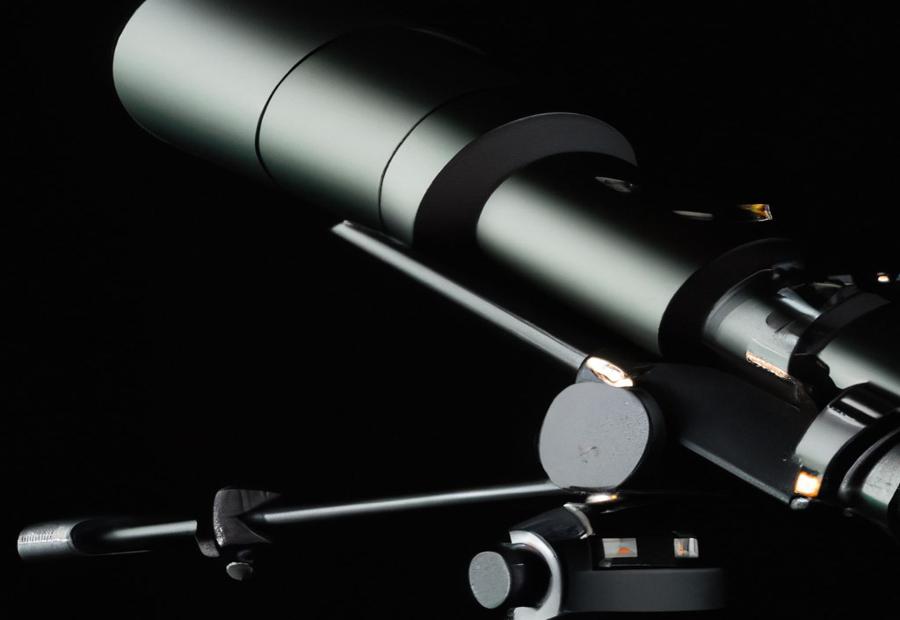
Photo Credits: Paintballbuzz.Com by Logan Rivera
While mounting a scope on a Picatinny rail may seem straightforward, there are additional tips and considerations that can greatly enhance your shooting experience.
In this section, we’ll uncover key insights to help you maintain and care for your mounted scope, ensuring optimal performance and longevity.
Additionally, we’ll explore the importance of zeroing and sighting in your scope, equipping you with the knowledge to achieve precise and accurate shots.
So, let’s dive in and discover the secrets to maximizing your scope’s potential on the Picatinny rail!
Proper Maintenance and Care for Your Mounted Scope
To ensure the longevity and optimal performance of your mounted scope, proper maintenance and care are essential. Follow these steps to keep your scope in top condition:
- Regular cleaning: Engage in regular cleaning of your scope using a soft cloth or brush to effectively remove dirt, dust, and debris. It is important to avoid using harsh chemicals or solvents that could potentially damage the lenses or other components of the scope.
- Protective covers: Whenever your scope is not in use, make sure to utilize protective covers or caps to safeguard the lenses from scratches, impacts, and moisture.
- Storage: Store your mounted scope in a cool and dry place to prevent its exposure to extreme temperatures or humidity. It is essential to avoid storing it in direct sunlight or areas that are prone to moisture.
- Safe handling: Exercise utmost care when handling both your firearm and the mounted scope. It is crucial to avoid dropping or mishandling the firearm, as it can negatively impact the alignment and calibration of the scope.
- Regular calibration: Periodically check and recalibrate your scope to ensure accurate and precise aiming. Refer to the manufacturer’s instructions for guidance on adjusting the windage and elevation of the scope.
- Inspect for damage: Regularly inspect your mounted scope for any signs of damage, such as cracks, loose screws, or foggy lenses. In case you notice any issues, it is recommended to seek professional assistance for repairs or replacements.
By diligently following these steps, you can guarantee the proper maintenance and care for your mounted scope, thereby prolonging its lifespan and maintaining its performance for years to come.
Zeroing and Sighting In Your Scope
When it comes to accurate shooting, zeroing and sighting in your scope are essential. So, here is a step-by-step guide to help you achieve the best results:
- Prepare your shooting range: Set up a target at a distance suitable for your firearm and ammunition specifications.
- Position your firearm: Securely place your firearm on a stable shooting rest or sandbags to minimize any movement.
- Align the scope: Take a look through the scope and adjust the windage and elevation knobs to center the reticle on the target.
- Take a shot: Aim directly at the center of the bullseye and fire a round at the target.
- Observe the impact: Analyze carefully where the bullet has hit the target in relation to your intended point of aim.
- Make adjustments: If needed, use the windage and elevation knobs to move the reticle to align with the actual impact point.
- Take another shot: Confirm the adjustments made by firing another round.
- Repeat if necessary: If the reticle is still not aligned with the impact point, continue making adjustments and firing shots until you achieve the desired accuracy.
- Record the adjustments: Keep track of the number of clicks or turns made on the knobs for future reference.
Remember, zeroing and sighting in your scope can vary depending on factors like distance, ammunition, and shooting conditions. It is recommended to periodically re-zero your scope and do so whenever you switch ammunition or shooting ranges.
Frequently Asked Questions
How to mount a scope on a Picatinny rail?
Mounting a scope on a Picatinny rail can be a simple process if you follow the right steps. Here’s a general guide on how to do it.
What tools do I need to mount a scope on a Picatinny rail?
To mount a scope on a Picatinny rail, you will need a torque wrench, scope rings or mount, screwdrivers, blue loctite (optional), a leveling kit for your rifle, and possibly a gun vice or saddle to hold your rifle securely.
How do I choose the right rings for mounting a scope on a Picatinny rail?
When choosing rings for mounting a scope on a Picatinny rail, you need to consider the tube diameter of your scope and the height of the rings. Generally, low rings are suitable for scopes with an objective size of 50mm or smaller, medium rings for 50mm and larger, and high rings for 56mm and larger. Additionally, the height of the rings should be based on the shape of your scope, the contour of your barrel, and where your cheek rests on the rifle stock.
What are the steps involved in mounting a scope on a Picatinny rail?
The process of mounting a scope on a Picatinny rail typically involves three stages: placement, adjustment, and tightening. First, you place the rings loosely on the rail and position the scope correctly with the proper eye relief. Then, you adjust the rings to fit the shape and size of the scope, ensuring they are sitting correctly on the rail. Finally, you tighten the rings to the rail using a torque wrench, following the manual for the correct amount of torque.
How do I ensure proper alignment and leveling when mounting a scope on a Picatinny rail?
To ensure proper alignment and leveling when mounting a scope on a Picatinny rail, you can use a scope level and a small bubble level. Match the upper ring to the bottom ring and use the scope level to ensure the reticle lines are straight. Throughout the adjustment process, double-check the scope’s level and make necessary adjustments.
Why is it important to properly tighten the scope rings when mounting a scope on a Picatinny rail?
Properly tightening the scope rings when mounting a scope on a Picatinny rail is crucial to ensure the scope is securely attached and won’t move during recoil or regular use. It helps maintain accuracy by preventing any shift or movement of the scope. It’s important to follow the manufacturer’s torque specs and tighten the rings accordingly, usually between 15-18 inch pounds.