

Mounting a scope on a rifle is a crucial step in ensuring accurate and precise shooting. Whether you’re a seasoned hunter, target shooter, or a beginner, understanding how to mount a scope on a rifle is essential for optimizing your shooting experience. This article provides a comprehensive guide on how to mount a scope on a rifle, along with tips and best practices.
The importance of proper scope mounting and the different types of scope mounts, including one-piece, two-piece, and Picatinny and Weaver mounts, are discussed. The article covers the selection of appropriate scope rings and the tools required for the mounting process.
A step-by-step guide is provided, detailing each stage from unloading the rifle and safety checks to sighting-in the scope and performing final checks.
Furthermore, common scope mounting issues are addressed, and troubleshooting tips are provided to help overcome them. By following this guide and implementing the best practices, you can ensure a secure and accurate scope mounting for your rifle.
Importance of Proper Scope Mounting
Proper scope mounting is of utmost importance when it comes to accurate shooting and target acquisition. The value of ensuring proper scope mounting cannot be emphasized enough. Imprudently mounted scopes can result in misalignment, consequently affecting the accuracy of your shots.
Therefore, it is absolutely essential to securely attach the scope to the rifle using high-quality mounts and rings. Additionally, adhering to the appropriate torque specifications is crucial in order to avoid the risk of either under-tightening or over-tightening, which can potentially cause damage.
By implementing proper scope mounting techniques, shooters can consistently achieve precise shots. Furthermore, proper scope mounting guarantees that the scope remains aligned even in the face of recoil and other challenging conditions.
It is imperative to invest time and effort in appropriately mounting and aligning your scope to optimize its performance and enhance your shooting experience.
It is important to note that the significance of proper scope mounting extends beyond the mere act of attaching the scope to the rifle; it directly impacts your shooting accuracy and overall performance.
Therefore, paying thorough attention to this critical aspect will ultimately elevate your shooting proficiency and ensure a satisfactory shooting experience.
Types of Scope Mounts
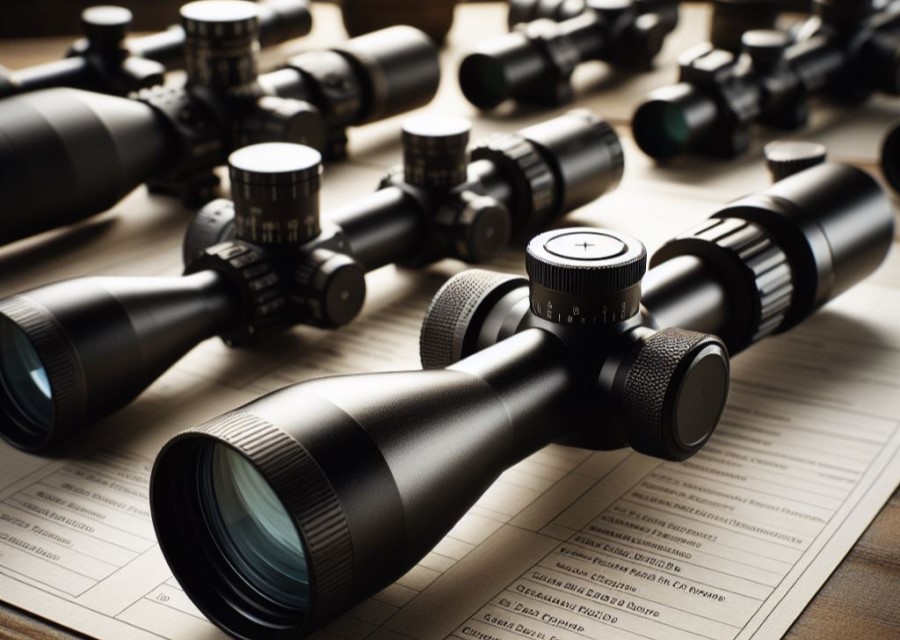
Photo Credits: Paintballbuzz.Com by Arthur Hill
When it comes to mounting a scope on a rifle, understanding the various types of scope mounts is essential. So, let’s dive into the world of scope mounts and explore the different options available.
From one-piece scope mounts to two-piece mounts, and the popular Picatinny and Weaver mounts, we’ll uncover the unique features and advantages of each. So, whether you’re a seasoned shooter or a curious beginner, get ready to discover the perfect scope mount for your rifle.
1. One-Piece Scope Mounts
One-Piece Scope Mounts are a popular choice among rifle enthusiasts for their simplicity and sturdiness. They consist of a single solid piece of metal that attaches the scope directly to the rifle’s receiver. This design provides added stability and eliminates the need for separate rings.
One-piece scope mounts are often made from high-quality materials such as aluminum or steel, ensuring durability and longevity. They offer easy installation, as the mount can be attached to the rifle using a few screws.
These mounts are designed to maintain alignment and hold zero even under heavy recoil, ensuring accurate and consistent shots. One-piece scope mounts are usually available in different heights to accommodate various scopes and provide proper eye relief.
They offer a streamlined and sleek appearance, enhancing the overall aesthetic of the rifle. Some one-piece scope mounts also feature built-in cantilever designs, allowing for extended eye relief or additional accessory attachments.
2. Two-Piece Scope Mounts
When it comes to mounting a scope on a rifle, one option to consider is two-piece scope mounts. These mounts offer certain advantages and considerations that are important to know:
- Flexibility: Two-piece scope mounts provide more flexibility in terms of adjusting the eye relief and positioning the scope on the rifle.
- Easy installation: Two-piece scope mounts are generally easier to install compared to one-piece scope mounts because they can be aligned separately for each ring.
- Availability: Two-piece scope mounts are widely available in various styles and designs, making it easier to find the one that suits your specific rifle and scope.
- Leveling: With two separate rings, it’s important to ensure that they are properly aligned and leveled to maintain the accuracy of the scope.
- Price range: Two-piece scope mounts are available in a range of prices, allowing you to choose one that fits your budget.
When choosing a two-piece scope mount, it’s important to consider factors such as durability, compatibility with your rifle and scope, and the reputation of the manufacturer. Additionally, it’s always a good idea to refer to the specific instructions provided by the manufacturer for proper installation.
3. Picatinny and Weaver Mounts
When choosing between Picatinny and Weaver mounts, consider the specific requirements of your rifle and the accessories you plan to attach.
If you need a more robust and versatile mounting system, Picatinny mounts may be the better choice. However, if you have a Weaver-compatible accessory or prefer a slimmer profile, Weaver mounts are a suitable option.
Remember to carefully follow the manufacturer’s instructions for installing and tightening the mounts to ensure a secure fit. Properly mounted scopes enhance accuracy and shooting performance.
Consider your shooting style, intended use, and the specific recommendations for your rifle when selecting the appropriate scope mount.
Choosing the Right Scope Rings
When it comes to mounting a scope on a rifle, choosing the right scope rings is essential. There are several key factors to consider:
Material: Scope rings are typically made of aluminum, steel, or titanium. Aluminum rings offer a lightweight and affordable option, while steel rings provide increased durability and are more suitable for heavy recoil.
Diameter: Scope rings come in various diameters to fit different scope tube sizes. It’s important to measure the diameter of your scope tube and choose rings accordingly to ensure a proper fit.
Height: Considering the height of the scope rings is crucial to achieve the desired height and eye relief for accurate sight alignment. You can find low, medium, and high rings to meet your specific needs.
Attachment: You have the choice between two main attachment methods for scope rings: 1-piece or 2-piece rings. 1-piece rings offer more stability, while 2-piece rings allow for easier scope adjustment.
When selecting the right scope rings, it’s important to take into account the material, diameter, height, and attachment method. By choosing the appropriate rings, you can ensure a secure and accurate mounting of your scope on the rifle.
Tools Required for Scope Mounting
Photo Credits: Paintballbuzz.Com by Paul Ramirez
When mounting a scope on a rifle, there are several tools required for scope mounting in order to have a successful installation:
- Torx wrench: A Torx wrench is necessary for tightening the screws on the scope rings.
- Screwdriver: A screwdriver is needed for securing the base and mounting the scope rings.
- Level: A level is essential to ensure the scope is aligned properly.
- Tape measure: A tape measure is useful for measuring the distance between the base and the rings for proper placement.
- Bubble level: A bubble level helps ensure the rifle is level while mounting the scope to maintain accuracy.
- Torque wrench: A torque wrench is used to apply the correct amount of torque to the screws, preventing damage to the scope and rifle.
Pro-tip: It’s important to follow the manufacturer’s instructions and specifications when using these tools required for scope mounting to ensure a secure and accurate scope mounting.
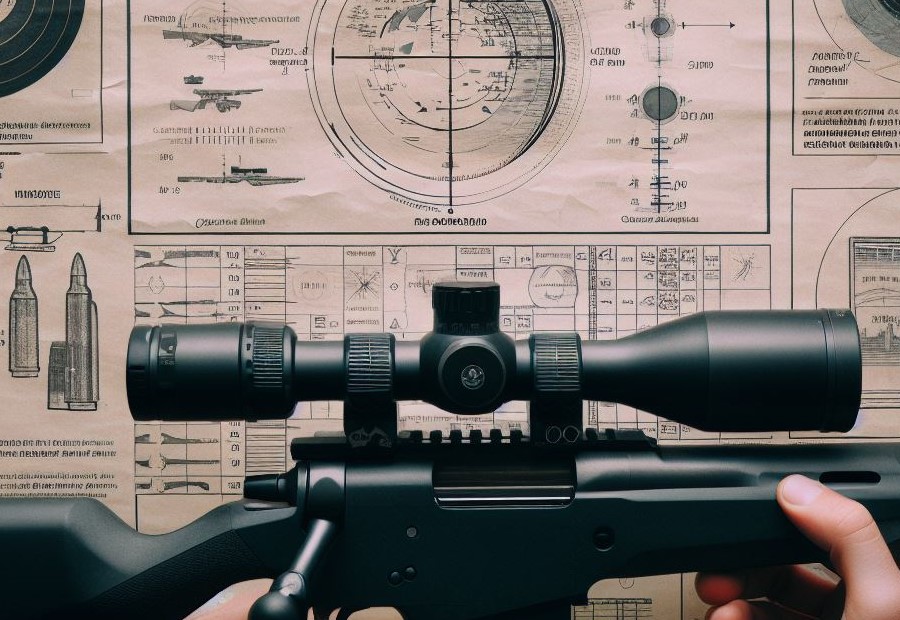
Step-by-Step Guide on Mounting a Scope on a Rifle
Interested in mounting a scope on your rifle? Look no further! In this step-by-step guide, we’ll walk you through the entire process, ensuring that your rifle and scope are perfectly aligned.
From unloading the rifle and performing safety checks to securing the rings and leveling the scope, we’ve got you covered. Get ready to gather the necessary tools and components, remove existing mounts or rings, and attach the scope with precision.
By the end, you’ll be equipped with the knowledge to tighten screws, perform final checks, and confidently sight-in the scope. Let’s dive in!
Step 1: Unload the Rifle and Perform Safety Check
To properly mount a scope on a rifle, the first step is to unload the rifle and perform a thorough safety check. Follow these steps:
Safety is of utmost importance when handling firearms. Ensure the rifle is unloaded by removing the magazine and checking the chamber for any remaining ammunition. Point the firearm in a safe direction throughout the process.
Visually inspect the rifle for any damage or abnormalities. Check the safety mechanism to ensure it is in the correct position. Verify that all accessories, such as slings or bipods, are securely attached.
Collect all the tools and components needed for scope mounting. This may include a torque wrench, screwdriver, scope rings, and mounting base. Ensure they are clean and in good working condition.
If there are already mounts or rings on the rifle, carefully remove them using the appropriate tools. Follow the manufacturer’s instructions or consult a professional if needed.
Inspect the scope for any damage and ensure it is clean and free from debris. Place the bottom halves of the scope rings onto the mounting base. Ensure they are properly aligned.
Secure the bottom halves of the scope rings onto the mounting base using the provided screws. Tighten them to the manufacturer’s recommended torque specifications using a torque wrench.
Carefully place the scope into the bottom halves of the rings. Adjust the position and eye relief to your preference, ensuring a comfortable shooting position.
Align the reticle of the scope with the rifle’s bore. Use a leveling tool to ensure the scope is level both horizontally and vertically. Make adjustments as necessary.
Place the top halves of the scope rings onto the scope. Ensure they are properly aligned with the bottom halves and tighten the screws to the manufacturer’s recommended torque specifications.
Double-check the alignment of the scope and make any necessary adjustments before proceeding. Tighten all screws on the scope rings and mounting base to the appropriate torque specifications.
Once everything is securely attached, perform final checks to ensure the scope is properly mounted and aligned. Follow the necessary steps to sight in the scope, adjusting for windage and elevation as needed.
By following these steps and taking the necessary safety precautions, you can effectively mount a scope on your rifle.
Step 2: Gather the Necessary Tools and Components
- Begin by ensuring you have a tidy and well-lit workspace.
- Double-check that you possess the appropriate tools for the task, which include:
- A torque wrench with the suitable range for your scope rings.
- Screwdrivers with the correct head sizes for the screws on your rifle and scope rings.
- Threadlocker to secure screws and prevent them from becoming loose over time.
- Leveling tools, such as a bubble level or scope leveling kit, to ensure proper alignment of your scope.
- Collect the necessary components:
- Your rifle equipped with the appropriate base or rail for mounting the scope.
- The scope rings, which should correspond to the diameter of your scope tube.
- A mounting kit, if necessary, which may contain additional screws or accessories.
- Thoroughly examine all the tools and components for any signs of damage or defects.
- Prepare a clean cloth or rag to wipe down the surfaces of the rifle and scope rings, eliminating any dirt or debris.
Step 3: Remove Existing Mounts or Rings
In order to mount a scope on a rifle, it is important to follow a step-by-step process. Here is a list of steps involved in this process:
- Ensure the rifle is unloaded and perform a safety check.
- Gather the necessary tools and components required for scope mounting.
- Remove the existing mounts or rings that are currently attached to the rifle.
- Inspect the rifle to ensure there are no remaining components that may interfere with the scope mounting process.
- Clean the mounting surface to remove any dirt, debris, or residue.
By carefully following these steps, you can safely and effectively remove the existing mounts or rings from your rifle, making way for the installation of a new scope.
Remember to exercise caution throughout the process and ensure the rifle is unloaded and safe to handle at all times.
Step 4: Prepare the Scope and Rings
When mounting a rifle scope, it is important to follow these steps to properly prepare the scope and rings:
- Start by carefully cleaning the scope lenses with a microfiber cloth to eliminate any dust or debris that may affect visibility.
- Next, thoroughly inspect the scope rings to check for any signs of damage or loose screws. If any issues are detected, make sure to tighten them.
- To prevent the screws from loosening over time, apply a thin layer of either scope mounting grease or Loctite to them.
- Align the bottom half of the rings with the mounting holes on the scope base, making sure they fit securely.
- Place the scope on top of the bottom half of the rings, ensuring that it is centered and properly aligned with the barrel.
- Using a bubble level, check that the reticle is correctly oriented and level the scope if necessary.
- Afterward, firmly attach the top half of the rings to the bottom half, making sure to tighten the screws evenly.
- Double-check the alignment of the scope and reticle, and make any necessary adjustments to achieve optimal positioning.
- Lastly, tighten all screws on the rings, ensuring they are snug but not overly tightened.
It is a fact that properly preparing the scope and rings before mounting allows for a secure and stable attachment, thus enhancing the accuracy and overall performance of the rifle.
Step 5: Attach the Bottom Half of the Rings to the Base
To successfully mount a scope on a rifle, it is important to attach the bottom half of the rings to the base properly. Follow these steps:
- Ensure that the rifle is unloaded and perform a safety check.
- Gather the necessary tools and components, including the rings, a screwdriver or allen wrench, and any additional mounting hardware.
- Remove any existing mounts or rings from the rifle.
- Prepare the scope and rings by ensuring they are clean and free from any dirt or debris.
- Take the bottom half of the rings and position them accurately on the base of the rifle, ensuring proper alignment.
- Use the screwdriver or allen wrench to securely tighten the screws on the rings, fastening them to the base. Be careful not to overtighten and damage the threads.
- Check the alignment of the rings and make any necessary adjustments to ensure the scope will be level.
- Once the bottom half of the rings is securely attached, proceed to place the scope into the rings.
- Align the reticle of the scope and level it using a bubble level or other tools if necessary.
- Secure the top half of the rings over the scope, aligning them with the bottom half.
- Check the alignment of the scope and rings again and securely tighten all screws to the manufacturer’s recommended torque specifications.
- Perform final checks, ensuring everything is secure and properly aligned before proceeding to sight-in the scope.
Pro-tip: To ensure a secure and precise mount, accurately position the bottom half of the rings to the base. Double-check the alignment multiple times during the process for optimal stability and alignment of your scope.
Step 6: Place the Scope in the Rings
Step 6: Place the Scope in the Rings
- Ensure that the rifle is securely held in a stable position, either by using a gun vise or by propping it up on sandbags or a shooting rest.
- Take the scope and carefully position it over the bottom half of the rings. Make sure that the rings are aligned with the mounting holes on the scope.
- Gently lower the scope into the rings, ensuring that the scope’s saddle fits snugly into the rings’ base.
- Adjust the position of the scope in the rings until you achieve the desired eye relief, which is the distance between your eye and the scope’s eyepiece when aiming.
- Ensure that the scope is level, both horizontally and vertically, so that the crosshairs are perfectly aligned with the rifle.
When placing the scope in the rings, it’s important to handle it with care to avoid any damage. Make sure to tighten the rings securely around the scope to prevent any movement during recoil.
Double-check that the scope is properly aligned and level before moving on to the next steps of securing the top half of the rings and checking alignment and tightening all screws.
Step 7: Align the Reticle and Level the Scope
- Once the scope is securely placed in the rings, it is crucial to properly align the reticle and level the scope with the rifle’s bore axis. This ensures that your shots will be accurate and on target.
- Using the adjustment turrets on the scope, center the reticle vertically and horizontally by visually aligning it with a vertical and horizontal reference point.
- Next, you need to level the scope. Place a bubble level on the flat top surface of the scope or on a specialized scope leveling tool attached to the scope base.
- Adjust the scope’s position until the bubble is centered in the level. This ensures that the scope is perfectly level with the rifle’s bore.
- Double-check the reticle alignment by looking through the scope and ensuring that the vertical post or crosshair is aligned with a vertical object in the distance.
- Make any necessary adjustments to fine-tune the reticle alignment until it is perfectly vertical and horizontal.
- Tighten the screws on the scope rings to secure the scope in its aligned position, but be careful not to over-tighten and damage the scope or its components.
Pro-tip: When aligning the reticle and leveling the scope, take your time and pay attention to detail. Even a slight misalignment can have a significant impact on your shooting accuracy.
Step 8: Secure the Top Half of the Rings
- Start by placing the top half of the scope rings on top of the scope.
- Ensure that the holes on the top half of the rings align with the holes on the bottom half.
- Next, insert the screws into the holes and hand-tighten them tightly to secure the top half of the rings.
- To further tighten the screws, use the appropriate tool, such as a screwdriver or Allen wrench.
- Make sure that the top half of the rings is securely fastened to both the bottom half and the scope.
- Take a moment to check the alignment of the scope and make any necessary adjustments.
- For a secure fit, evenly tighten all screws, alternating between them to ensure equal pressure.
- Avoid any movement during use by double-checking the alignment and tightness of all screws.
By following these steps, you can securely attach the top half of the rings to your scope, providing stability and ensuring proper alignment for accurate shots.
Step 9: Check Alignment and Tighten all Screws
When mounting a scope on a rifle, Step 9: Check Alignment and Tighten all Screws is a crucial step to ensure accuracy and stability. Follow these steps to properly check alignment and tighten the screws:
- Using a screwdriver or appropriate tool, carefully tighten all screws on the scope rings, making sure they are snug but not over-tightened.
- Check the alignment of the reticle by looking through the scope and ensuring it is centered and level. Adjust if necessary.
- Using a torque screwdriver, tighten the screws on the scope mount base and rings to the manufacturer’s recommended torque specifications. This helps prevent over-tightening and damage to the scope or rifle.
- Double-check the alignment of the reticle after tightening the screws to ensure it has not shifted.
- Inspect all screws again to ensure they are properly tightened and secure.
Checking alignment and tightening all screws is essential to maintain the stability of the scope and ensure accurate aiming and shooting. Failing to properly tighten the screws can result in shifting or movement of the scope, leading to decreased accuracy.
Step 10: Perform Final Checks and Sight-In the Scope
- Ensure the rifle is unloaded and perform a safety check.
- Gather the necessary tools and components required for the final checks and sight-in process.
- Check for any signs of damage or looseness in the scope mounts and rings.
- Inspect the optic for any debris or smudges on the lenses. Clean if necessary.
- Align the reticle with a target at a known distance. Make adjustments if needed.
- With the rifle securely positioned on a rest, take a shot at the center of the target.
- Examine the bullet impact on the target. If it deviates from the aim point, adjust the scope accordingly.
- Fire a second shot to confirm the adjustments made. Repeat as necessary until the desired accuracy is achieved.
- Tighten all screws and connections, ensuring that everything is secure.
- Perform a final check of all the components, including the reticle alignment and scope stability.
Fact: Properly sighting in a scope ensures that the point of impact matches the point of aim, resulting in accurate shooting at various distances.
Troubleshooting Common Scope Mounting Issues
- When mounting a scope, it is important to ensure proper alignment. Check that the scope rings are aligned with each other and that they are level with the rifle.
- To secure the scope properly, torque the screws evenly. It is recommended to use a torque wrench and follow the specifications provided by the manufacturer.
- When positioning the scope, verify the eye relief. Make sure the distance from your eye to the scope allows for a clear and comfortable view.
- After firing a few rounds, it is crucial to check for any scope movement or shifting. If any is detected, retighten the screws to avoid further issues.
- To confirm the stability of the mount, consider using a boresighter or shooting a group of shots at a target. Consistent shifts in the point of impact may indicate a problem with the scope mount.
- Perform a thorough inspection for any signs of damage or wear that could affect the performance of the scope mount, rings, or screws.
- For added security, it is recommended to apply a small amount of thread-locking compound to the screws. This will prevent them from loosening over time.
- If you encounter persistent problems or are unsure about the mounting process, it is always advisable to seek professional assistance from a gunsmith.
Tips and Best Practices for Scope Mounting
When it comes to mounting a scope on a rifle, it is important to follow these tips and best practices:
- Choose the right mounting system: Consider factors such as the type of rifle and the intended use of the scope. Different rifles may require specific mounting systems.
- Ensure proper alignment: It is crucial to align the scope properly with the rifle’s bore. This ensures accuracy and consistency in shots.
- Use the correct torque: When tightening the scope rings or bases, use a torque wrench to ensure the proper amount of torque. This helps prevent overtightening or undertightening, which can affect the stability of the scope.
- Level the reticle: Make sure the reticle is level with the rifle. This can be done using a leveling tool or by ensuring the vertical crosshair aligns with a plumb line.
- Test for accuracy: After mounting the scope, it is essential to zero the rifle. Take it to the range and adjust the scope until you achieve the desired accuracy.
Frequently Asked Questions on How to Mount a Scope on A Rifle
How do I mount a scope on a rifle using the proper tools and components?
To mount a scope on a rifle, you will need a set of tools and components. Start by securing a well-lit, sturdy workbench with a gun-vise. Gather quality hand tools, a torque wrench, and small bubble-levels. Then, follow these steps:
- Secure the scope rings to the base at the recommended torque value.
- Install the optic in the rings at the highest magnification, but don’t completely secure the ring screws yet.
- Space the rings no closer than 3/8″ from the magnification adjustment ring in the rear and center or slightly forward of center on the tube in the front.
- Adjust the riflescope fore-and-aft in the mounts until a full sight picture is achieved with the rifle shouldered and the head in a natural position.
- Level the scope by placing a level on a flat spot of the scope, such as the base, and leveling it out.
- Tighten the scope ring screws incrementally to the recommended torque-poundage of 15-18in.lbs without thread-locker.
- Pay attention to evenly spacing the gaps on either side of horizontally split rings, or fully tighten one side before moving on to the other if using vertically-split rings.
- If you have any questions or a unique mounting system, it is advised to contact the experts for guidance.
Why is it important to properly mount a scope on a rifle?
Properly mounting a scope on a rifle is crucial for accuracy and ethical shooting. Accurate shot placement is essential for hunters to ensure humane kills and minimize suffering. Mounting the scope correctly helps avoid accuracy issues and gives shooters confidence in their equipment. A poorly mounted scope can cause a rifle to lose zero, resulting in missed shots or compromised accuracy. To ensure a proper fit, the scope must be securely attached to the rifle with precise alignment.
What are the steps to align the reticle and attach surfaces when mounting a scope on a rifle?
When mounting a scope on a rifle, aligning the reticle and attaching surfaces is important for optimal accuracy. Follow these steps:
- Mount the bases as low as possible without the objective bell touching the barrel.
- Ensure the bases are properly aligned and attach them using screws.
- Apply a rust preventive or thread-freezing compound to the screws for maximum security.
- Align the reticle by rotating the scope until it is vertical and horizontal.
- Adjust the eye relief by positioning the scope about an inch farther forward than you think it should be.
- Double-check the scope’s position and tighten the ring screws.
What is the recommended method for bore sighting when mounting a scope on a rifle?
Bore sighting is an essential step when mounting a scope on a rifle to achieve accurate sight alignment. Follow these steps for effective bore sighting:
- Use a solid rest and a target at least 18 inches square.
- Remove the bolt and ensure the rifle is unloaded.
- Look through the bore and center the target in the barrel.
- Without moving the rifle, adjust the vertical and horizontal axis of the scope’s crosshairs using the turret saddle.
- Fire a sighting shot to confirm the zero, making sure to align the crosshairs with the bullet hole.
What are some common mistakes to avoid when mounting a scope on a rifle?
When mounting a scope on a rifle, it’s important to avoid common mistakes that can negatively impact accuracy. Here are some mistakes to watch out for:
- Using the wrong tools or over-tightening screws, which can cause damage.
- Failing to properly align the reticle or attach surfaces, resulting in a misaligned scope.
- Not adjusting the eye relief correctly, leading to discomfort and compromised sight picture.
- Skipping the bore sighting process, which can result in improper calibration and sight adjustment.
- Not fully tightening the scope ring screws or unevenly spacing gaps in horizontally split rings.
What resources are available for additional information on mounting a scope on a rifle?
If you want to learn more about mounting a scope on a rifle, there are several resources available. You can find videos and blogs on websites like Vortex Optics and Outdoor Life that provide step-by-step instructions and tips. Additionally, contacting Vortex Optics experts or reaching out to a knowledgeable gun shop operator can offer valuable guidance based on your specific needs and equipment.