Aligning scope crosshairs is a crucial step in ensuring accurate shooting and target acquisition. Whether you are a hunter or a target shooter, understanding how to align scope crosshairs is essential for achieving consistent and precise results. In this article, we will delve into the process of aligning scope crosshairs, the importance of doing so, and the tools required for the task.
Proper alignment of scope crosshairs allows for accurate bullet placement, ensuring that your shots hit the intended target. It enables you to make precise adjustments for windage and elevation, compensating for bullet drop or drift. Without proper crosshair alignment, your shots can go off-target, leading to missed opportunities and frustration.
In the upcoming sections, we will provide a step-by-step guide on how to align scope crosshairs, covering essential steps like mounting the scope properly, setting up a stable shooting position, bore sighting the rifle, and adjusting the windage and elevation turrets. We will also discuss fine-tuning the crosshair alignment for optimal accuracy.
We will address some common issues that shooters may encounter during the alignment process, such as parallax error, misaligned scope mount, and crosshair canting. Understanding these issues and troubleshooting them can help you achieve better crosshair alignment and improve your shooting performance.
By following the techniques and tips outlined in this article, you can confidently align scope crosshairs and enhance your shooting precision. So, let’s get started and master the art of aligning scope crosshairs for accurate and successful shooting endeavors.
Why is it Important to Align Scope Crosshairs?

Aligning scope crosshairs is crucial for achieving accurate and precise aim in shooting sports and hunting. The proper alignment of the crosshairs plays a vital role in ensuring that shots are not missed and performance is not compromised. It is essential to align the scope crosshairs to ensure that the intended point of aim matches the resulting point of impact, thereby increasing the likelihood of hitting the target.
This importance becomes even more pronounced in long-range shooting, where even a minor misalignment can significantly impact accuracy. By aligning the scope crosshairs correctly, shooters can consistently and reliably make shots, thus enhancing their overall marksmanship skills.
A real-life example vividly illustrates the significance of aligning scope crosshairs. During a shooting competition, a professional shooter consistently failed to hit targets, despite using top-quality rifling and ammunition. After carefully examining the issue, it was discovered that the scope crosshairs were misaligned.
Once this problem was rectified and the crosshairs were properly aligned, the shooter’s accuracy drastically improved. Consequently, the shooter went on to triumph in the competition, thereby highlighting the vital role of aligning scope crosshairs in achieving success in shooting sports.
Tools Required for Aligning Scope Crosshairs
When aligning scope crosshairs, you will need the following tools:
- A screwdriver: It is used to adjust the windage and elevation knobs on the scope.
- A bore sighter: Bore sighters helps in aligning the scope with the bore of the rifle, ensuring a more accurate shot.
- A gun vice or rest: This provides stability for the rifle while making adjustments to the scope.
- A laser boresighter: This tool emits a laser beam, allowing for precise alignment of the crosshairs with the target.
- An Allen wrench set: You may need different sizes of Allen wrenches to tighten or loosen screws on the scope.
- A scope level: This ensures that the scope is perfectly level, eliminating any potential for canting.
- A target: This is used to visually assess the alignment of the crosshairs with the target.
- A cleaning kit: It’s important to have a clean and clear scope for accurate shooting.
Step-by-Step Guide: How to Align Scope Crosshairs?
Get ready to master the art of aligning scope crosshairs with this step-by-step guide. We’ll cover everything you need to know to ensure precise and accurate shots. From mounting the scope properly to adjusting windage and elevation turrets, we’ll walk you through each essential step. Whether you’re a seasoned shooter or just starting out, this guide will equip you with the skills to fine-tune your crosshair alignment like a pro. Say goodbye to missed shots and hello to bullseyes!
Mounting the Scope Properly
When it comes to mounting the scope properly, the first step is to align the scope crosshairs. Follow these steps to ensure proper mounting:
- Choose the right mount: Select a mount that is compatible with your scope and firearm. Consider factors such as the type of firearm, mounting system, and the scope’s tube diameter.
- Prepare the firearm: Make sure the firearm is unloaded and chambered to avoid any accidents during the mounting process.
- Attach the base: Install the base onto the firearm using the provided screws. Ensure that it is firmly secured and aligned correctly with the receiver or rail.
- Attach the rings: Place the rings onto the base and align them properly. Tighten the ring screws gradually and evenly, alternating between screws to ensure equal pressure.
- Place the scope: Position the scope into the rings, making sure it is level and centered. Adjust the eye relief, so there is a proper distance between your eye and the scope’s eyepiece.
John, an avid hunter, decided to mount a new scope on his rifle before a hunting trip. He carefully followed the steps for mounting the scope properly, ensuring everything was aligned and secure. During his hunting expedition, his scope remained perfectly zeroed, allowing him to take accurate shots without any issues. Thanks to his attention to detail during the mounting process, John had a successful and enjoyable hunting experience.
Setting Up a Stable Shooting Position
When aligning scope crosshairs for accuracy and consistency, it is essential to set up a stable shooting position. This step-by-step guide will help you achieve this:
- Choose a solid shooting platform: Find a sturdy surface or utilize a shooting bench or bipod to provide stability.
- Assume a proper stance: Stand with your feet shoulder-width apart, distributing your weight evenly. Position your body perpendicular to the target.
- Grip the rifle correctly: Hold the rifle firmly but not excessively tight. Place your dominant hand on the pistol grip and support the barrel with your other hand.
- Position the buttstock firmly: Ensure a solid and consistent contact point for recoil management by placing the buttstock firmly against your shoulder.
- Align your eye with the scope: Achieve a clear and full sight picture by bringing your eye to the correct distance from the scope. Avoid straining or squinting.
- Maintain a relaxed posture: Minimize unwanted movement and tension by staying relaxed while maintaining a stable stance and grip.
- Breathe and control your trigger squeeze: Take a deep breath, exhale partially, and pause briefly. Apply gradual and smooth pressure to the trigger as you aim.
By following these steps to set up a stable shooting position, you can ensure accurate alignment of your scope crosshairs, resulting in precise and consistent shooting.
Bore Sighting the Rifle
- Prepare the rifle: Ensure that the rifle is unloaded and secure it in a stable shooting position. Place it on a gun rest or use sandbags for support.
- Mount the bore sighter: Attach the bore sighter, such as a laser bore sight, to the muzzle of the rifle. Make sure it is secure and aligned with the barrel.
- Look through the scope: While maintaining a safe position, look through the scope and adjust the windage and elevation settings to center the crosshairs on the bore sighter’s laser dot.
- Align the rifle and target: Choose a distant target and position the rifle so that the laser dot aligns with the target’s bullseye or center point.
- Verify alignment: Look through the scope again and verify that the crosshairs are aligned with the target’s bullseye or center point. Make necessary adjustments to align them, if needed.
- Remove the bore sighter: Once the bore sighting is complete and the crosshairs are aligned, safely remove the bore sighter from the rifle.
Adjusting the Windage & Elevation Turrets
Adjusting the windage and elevation turrets is a crucial step in aligning scope crosshairs properly. Here is a step-by-step guide to help you through this process:
- Start by identifying the windage and elevation turrets on your scope. These are located on the top and sides of the scope body.
- Using your fingers or a tool, gently rotate the windage turret to adjust horizontal alignment. Each click on the turret will typically correspond to a specific distance at the target. Refer to your scope’s user manual for the specific click value.
- To adjust the vertical alignment, rotate the elevation turret. Again, each click on the turret will correspond to a specific distance. Make sure to match the click values with the windage turret for accurate adjustments.
- Continue making adjustments to both turrets, alternating between windage and elevation, until the crosshairs align with your target. It may take a few adjustments to achieve the desired alignment.
Pro-tip: Take your time when adjusting the windage and elevation turrets. Make small, incremental adjustments and re-check the alignment after each adjustment. This will help you avoid overcompensating and ensure precise alignment of your scope crosshairs.
Fine-Tuning the Crosshair Alignment
When it comes to fine-tuning the crosshair alignment during scope adjustment, there are a few essential steps to follow:
- Make sure the rifle is securely mounted and stable.
- Look through the scope and find a suitable target at a reasonable distance.
- Using the windage and elevation turrets, make small adjustments to center the crosshairs on the target.
- Take note of any changes needed to compensate for bullet trajectory, such as distance or windage.
- After making initial adjustments, fire a few rounds to confirm the crosshair alignment.
It’s important to keep in mind that fine-tuning the crosshair alignment may require multiple adjustments and iterations. Patience and careful observation are key to achieving precise alignment.
To enhance the accuracy of your shots, consider:
- Using a shooting rest or sandbag to stabilize the rifle during adjustments.
- Using a professional bore sighting tool to aid in aligning the crosshairs.
- Seeking guidance from experienced shooters or professionals for additional tips and techniques.
Troubleshooting Common Issues During Crosshair Alignment
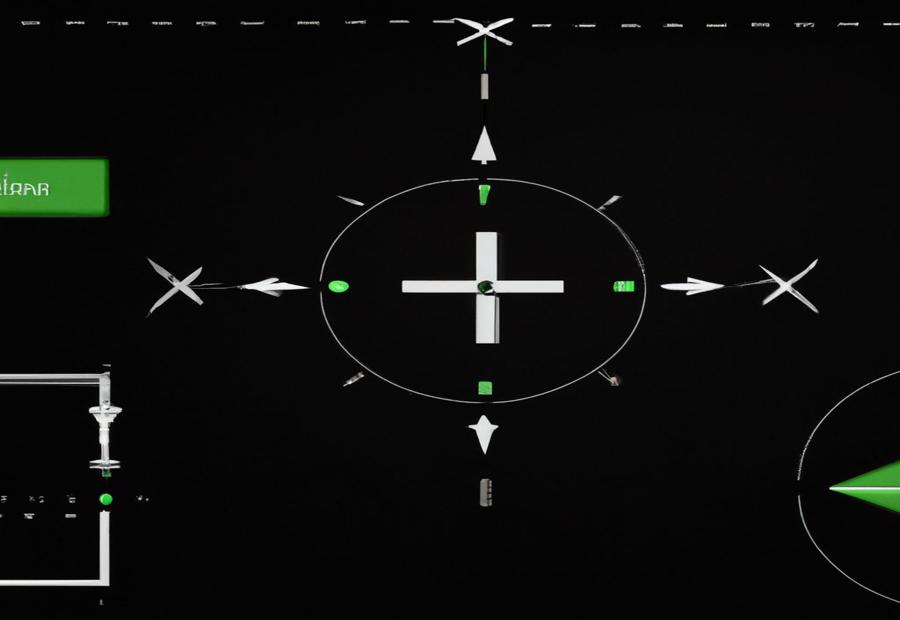
Photo Credits: Paintballbuzz.Com by Wayne Harris
Having trouble aligning your scope crosshairs? Don’t worry, we’ve got you covered! In this section, we’ll address some common issues that might arise during crosshair alignment. From parallax errors to misaligned scope mounts and crosshair canting, we’ll explore each problem and provide potential solutions. So, if you’re eager to improve your shooting accuracy and precision, buckle up and let’s dive into troubleshooting these crosshair alignment challenges!
Parallax Error
Parallax error is a common issue that can affect the accuracy of your scope crosshair alignment. It occurs when the reticle appears to shift in relation to the target when you move your eye behind the scope. This can lead to shots landing off target.
To avoid the issue of parallax error, it is important to understand and adjust the parallax settings on your scope. Many modern scopes have adjustable parallax knobs or dials that allow you to focus the reticle and eliminate parallax.
To address the issue of parallax error:
– Begin by adjusting the parallax setting on your scope based on the distance to your target. Consult the scope’s manual or the manufacturer’s guidelines for recommended parallax settings.
– Properly position your eye behind the scope to ensure a consistent sight picture. This is crucial for minimizing the issue of parallax error.
– Take your time to focus on the reticle and make any necessary adjustments to eliminate parallax.
Pro-tip: To further enhance accuracy, practice proper shooting techniques and maintain a steady shooting position. This will help minimize any potential parallax error and improve the overall performance of your scope.
Remember, addressing the issue of parallax error is essential for achieving precise and consistent shot placement. By understanding and adjusting the parallax settings on your scope, you can minimize this issue and improve your shooting accuracy.
Misaligned Scope Mount
- Step 1: To address the issue of a misaligned scope mount, start by checking the scope mounting screws to ensure they are properly tightened. Loose screws can cause the scope to shift and become misaligned.
- Step 2: Use a leveling tool or a bubble level to ensure the rifle is level when mounting the scope. This will help prevent any misalignment caused by an uneven mounting surface.
- Step 3: Next, check the alignment of the rings or bases that hold the scope. Make sure they are properly aligned and tightened to prevent any movement that could lead to scope misalignment.
- Step 4: For further alignment, consider using a boresighter or laser bore sight to align the scope with the rifle’s bore. This will provide a starting point for adjustments.
- Step 5: As you align the crosshairs with the target, make small adjustments to the scope’s windage and elevation turrets. Follow the manufacturer’s instructions for these adjustments.
- Step 6: Finally, double-check the alignment of the scope mount and make any necessary adjustments. Ensure that everything is securely tightened to prevent movement and misalignment.
By following these steps, you can successfully address Issue 2: Misaligned Scope Mount and ensure that your scope is properly aligned for accurate shooting.
Crosshair Canting
Crosshair Canting refers to the problem of crosshair misalignment due to the scope being tilted or canted. This can happen when the scope is not properly mounted or when the rifle is held at an angle when aiming.
- Identify the problem: To determine if you have a crosshair canting issue, look for signs of the crosshair not aligning perfectly with the vertical and horizontal lines.
- Check mounting: Ensure that the scope is securely mounted and aligned with the rifle. If the scope is not properly aligned with the bore, it can lead to canting.
- Repositioning: If you notice a crosshair canting issue, adjust the position of the rifle to ensure that it is held perfectly level. Make sure your shooting position allows for a steady and upright alignment.
- Correcting canting: If the crosshair continues to cant, you may need to make fine adjustments to the scope mounts. Use a leveling tool to ensure that the scope is perfectly aligned with the rifle.
To prevent crosshair canting issues in the future, it is important to mount your scope properly and maintain a consistent shooting position. Regularly check the alignment of your scope and make necessary adjustments to avoid any canting problems. Remember, an accurate crosshair alignment is crucial for precise aiming and shooting accuracy.
Final Thoughts on Aligning Scope Crosshairs
Photo Credits: Paintballbuzz.Com by Terry Anderson
Aligning scope crosshairs is a crucial aspect of using a scope effectively. Here are some final thoughts to keep in mind:
1. Precision is key: It is essential for accurate shot placement to align the scope crosshairs with the target precisely. Take your time and ensure the crosshairs are perfectly centered on the target.
2. Consistency matters: When adjusting the scope, make sure to maintain consistency in your adjustments. This will help you develop muscle memory and improve your shooting accuracy over time.
3. Practice makes perfect: Aligning scope crosshairs is a skill that requires practice. Regularly engage in target practice sessions to improve your proficiency in aligning the crosshairs consistently.
4. Consider environmental factors: Keep in mind that external factors such as wind, elevation, and lighting conditions can affect the accuracy of your shot. Take these factors into consideration and make adjustments accordingly.
5. Seek expert advice: If you’re struggling with aligning your scope crosshairs, don’t hesitate to seek advice from experienced shooters or firearms instructors. They can provide guidance and tips to help you improve.
Remember, aligning scope crosshairs is a process that requires patience and practice. With time and effort, you can improve your shooting accuracy and make the most of your scope.
Frequently Asked Questions
How to align scope crosshairs?
Aligning scope crosshairs is essential for accurate shooting. Here are the steps:
What tools can be used to align scope crosshairs?
You can use various tools to align scope crosshairs, such as bubble levels, carpenter’s spirit levels, and precision alignment grids.
What is the Level-Right PRO and how does it help with aligning scope crosshairs?
The Level-Right PRO is a tool developed by Real Avid that simplifies the process of aligning scope crosshairs. It uses a Reticle Light and a leveled Precision Alignment Grid to ensure accurate alignment.
How does the Level-Right PRO work?
The Level-Right PRO indexes with the radii of the barrel and the scope objective bell simultaneously. It projects the reticle onto a Precision Alignment Grid, allowing you to rotate the scope until the reticle aligns with the grid’s vertical and horizontal planes.
What are the benefits of using the Level-Right PRO?
The Level-Right PRO eliminates the need for cumbersome procedures and multiple bubble levels. It simplifies the scope installation process, ensuring that the entire barreled action and scope assembly are properly leveled.
Where can I find more information about aligning scope crosshairs?
You can visit Real Avid’s website and check out the Level-Right PRO’s product page for more detailed information, pictures, and videos.
